Another week and another frequently requested enhancement to Finds. You can now upload additional pictures to the Finds in your collection. Just open the detail page for any Find and underneath you will see a new “Add a Photo” button. Click or tap that button and you’ll be able to select a photo (or take one, if you are using a smartphone with a camera). You can add multiple photos to a Find.
Personally, I plan to add photos of my outfits where I’m wearing the item. For example, here are the photos I added for my white AG jeans. You will also be able to see them if you go to the detail page for that Find.
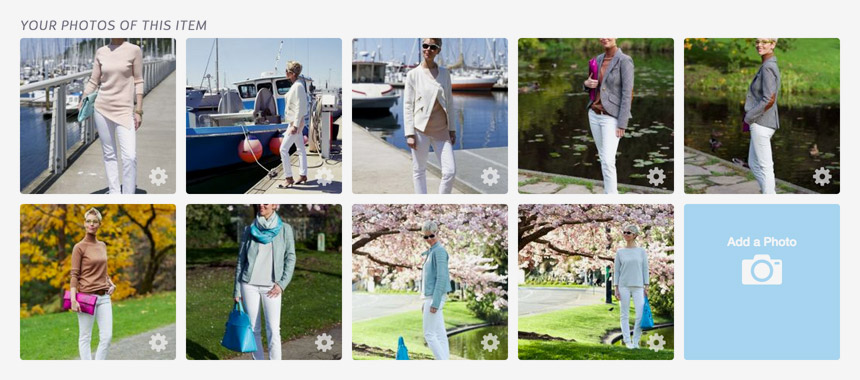
You will see a little gear icon on the bottom right of each of your uploaded photos. That opens a menu where you can remove the photo (be careful, it gets deleted immediately), or make it the cover for the Find. Now, by “cover” we mean the picture that appears on the little card that represents the item wherever it appears on YLF.
The screenshots below illustrate the steps for changing the cover. First click or tap the gear on the picture that you want for the cover, then choose “Use as Cover”. You will immediately see the change. Note that the text underneath the card now says “Image by you” instead of “Image by Bloomingdale’s”. Note also that you can change the cover back to the original Bloomingdale’s image by clicking or tapping “restore default cover” (step 3 in the screenshots below).

While everyone can see the pictures you add to the details page of a Find, only YOU see the changes you make to its cover. You don’t affect the way other people see the card for a Find. They either see the default image or a picture they have chosen from their own pictures.
Please give it a whirl. As always, let us know in the technical support area of the forum if you encounter any problems.
