Thirty-something Jeniese Hosey lives in Birmingham, Alabama, and created her blog, The Je Ne Sais Quoi, to share her love for fashion and beautiful things. Her style is feminine, relaxed, and on trend. Jeniese loves colour and bold pattern mixing. She enjoys experimenting with different silhouettes and has bucketloads of fun with footwear and funky eyewear. Her short ‘do and stunning smile are also an essential part of her style.
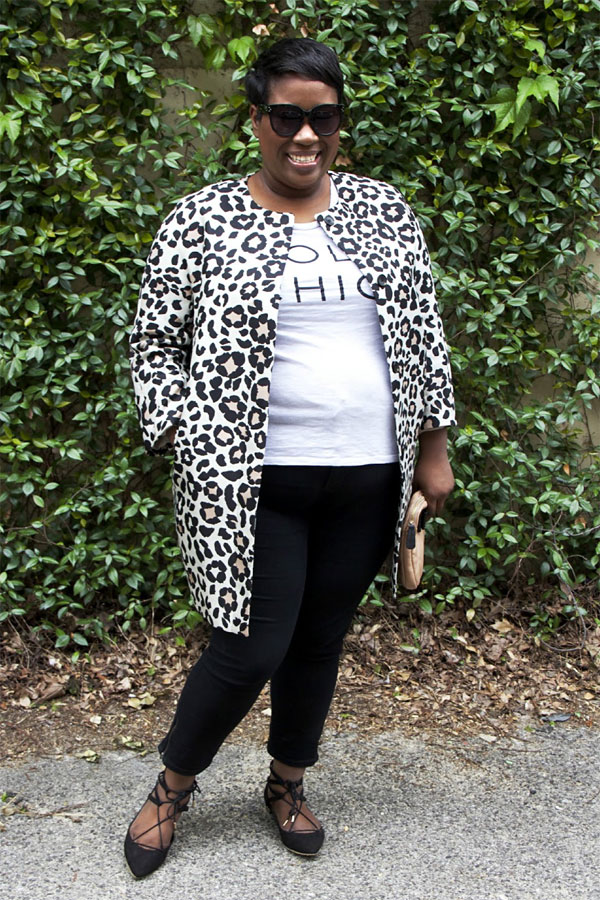
A simple tee and jeans outfit feels more pulled together when you throw on a great jacket. Jeniese is sporting black denim leggings with a fun slogan print tee. She’s rolled the jeans to showcase pointy toe lace-up flats that elongate the leg line, and give the look an elegant ballerina-esque vibe. The knee-length leopard print jacket injects tons of oomph into this all neutrals look. The collarless style and open neckline work well on a larger bust. The small quilted clutch picks up the stone in the topper. Big sunnies finish off the look.
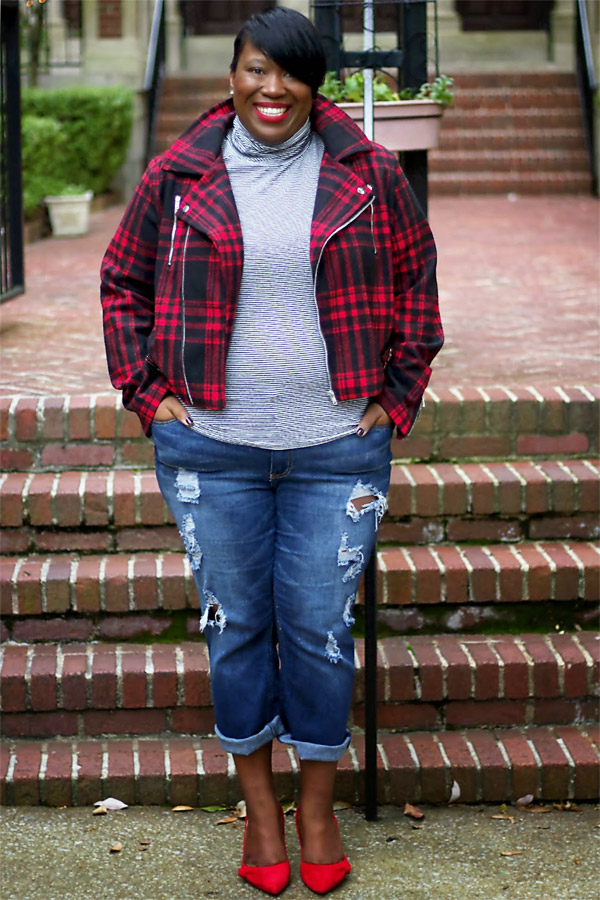
This red and blue outfit makes me smile because every single detail is so spot on. The hectically distressed boyfriend jeans paired with the ladylike pumps with cute bow detail are a fab outfit juxtaposition! The buffalo plaid pattern mixed with the thin blue and white stripes is complementary. The soft drape of the turtleneck against the stiffer fabric of the wool moto jacket creates nice textural interest. The way the striped top forms a column of colour with the blue jeans creates a long lean line. Jeniese has an excellent eye for detail. Her asymmetric fringe and bold red lip make things extra cheeky.
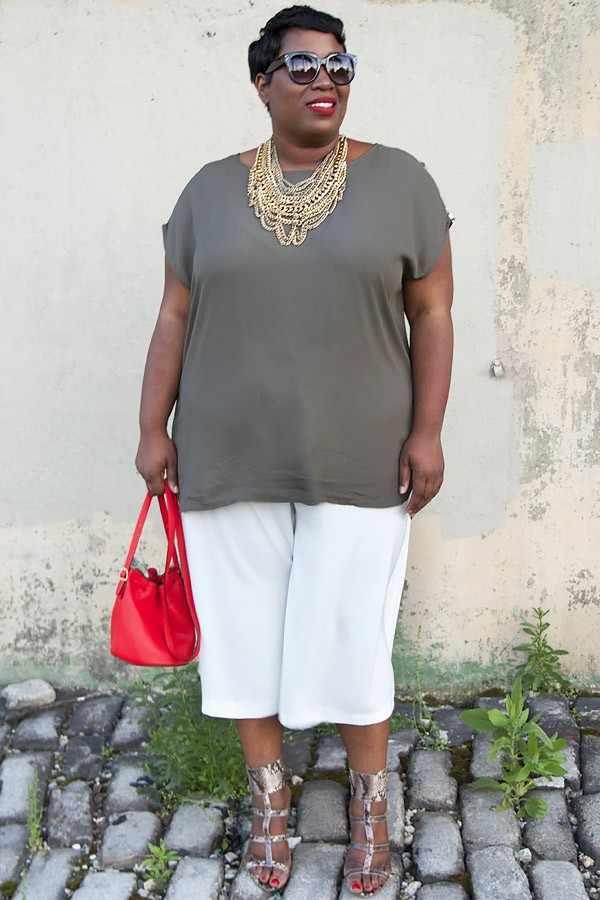
An on trend volume-on-volume culottes look in a fresh khaki and cream colour scheme. The roomy zip shoulder tunic has flattering diagonal short sleeves that showcase most of the arms, which creates structure. Jeniese’s eye-catching snakeskin sandals with wide ankle strap do the same. Her small tomato red bucket bag and toenails add zing to the khaki and cream colour palette. The statement bib necklace is trademark Jeniese.
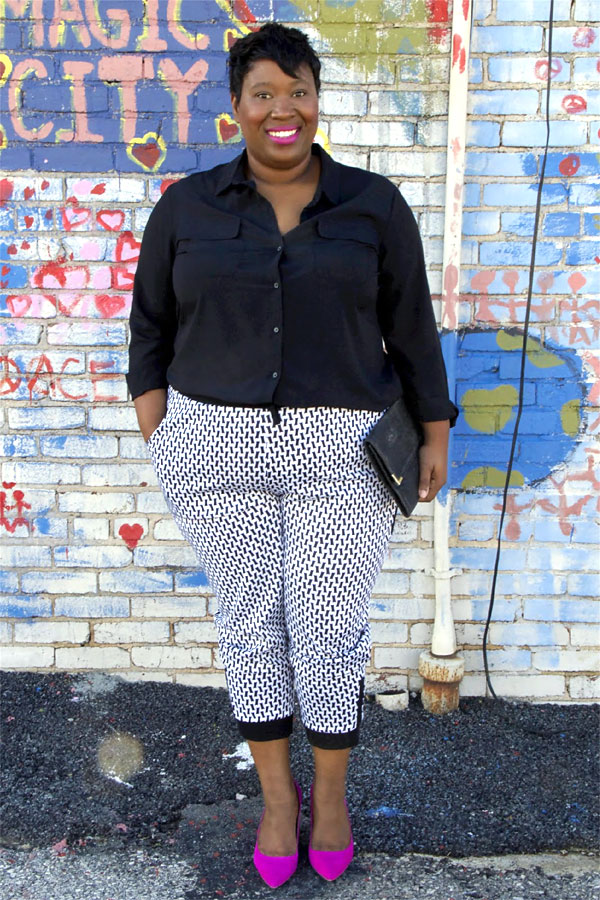
Modern Classic Meets Sporty Luxe. Jeniese adds polish to a pair of patterned dressy trackpants by pairing them with a silk button-down shirt. The fun geometric pattern and colour blocked hems add graphic interest. And I love it that Jeniese opted for lighter-coloured bottoms with a dark top. Makes for a fun change. Tucking the shirt into the cropped trousers creates structure. Delicious magenta suede pointy toe pumps and matching lippie make the entire outfit sparkle. The strict envelope clutch fits the dressy vibe perfectly.
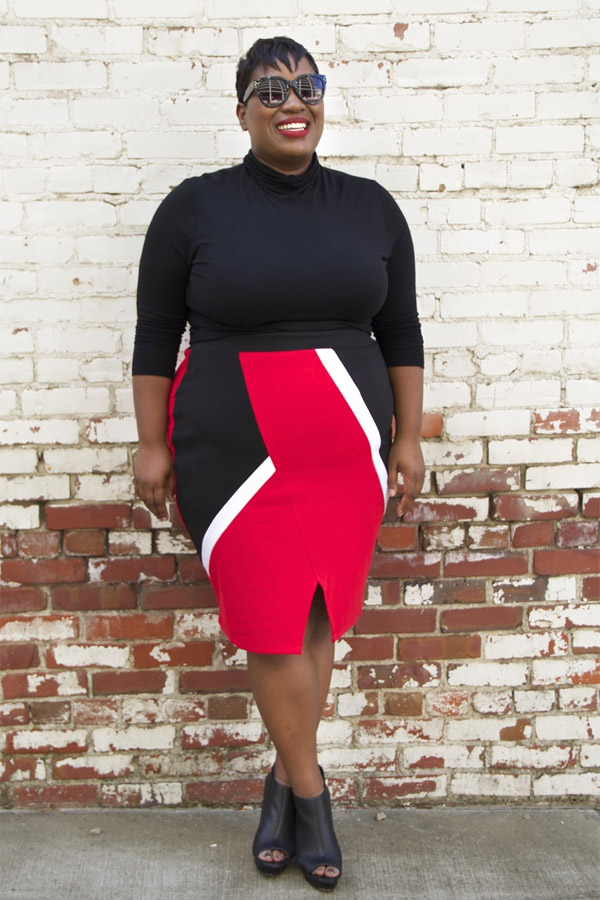
Another look with a fantastic graphic vibe, this one is Bombshell Chic. I’ve fallen head over heels in love with this sassy knee-length pencil skirt. The curve-hugging fit and front vent create subtle allure. The asymmetrical colour blocks suit Jeniese spunky personality to a T. Bustier women sometimes shy away from turtleneck tops, but choosing one in a fine gauge knit with a mock turtleneck can look splendid. Jeniese has tucked the formfitting top, which creates a sleek and streamlined effect. Edgy sandal booties bookend our blogger’s black hair. Oversized sunnies and Jeniese stunning smile are the stylish icing on the cake.
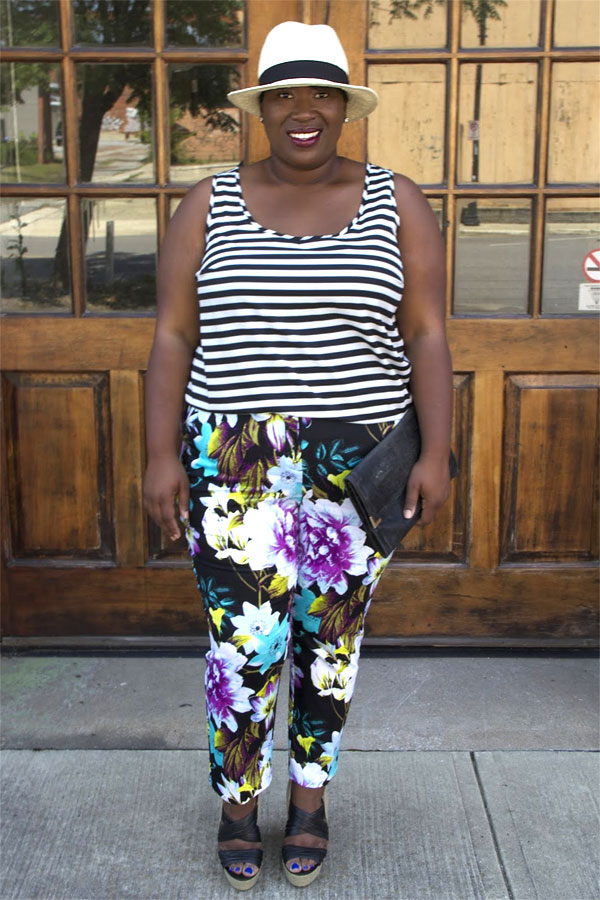
I feel that pattern mixing is an essential part of our blogger’s fashion and fun loving personality. For this casual Summer outfit, Jeniese combines two dominant, equally bold, patterns. A Breton striped tank top in white and black, and trousers with a big, colourful floral print. Making sure the top and trousers have one colour in common — in this case the black stripe and black background on the pants — helps to create visual harmony. Tucking the top into the tapered trousers adds structure. The black wedges, black clutch and black band on the Panama hat further pull the look together. Also note how the cream hat echoes the lighter parts of the wedge sandals. Blue toenails are the fun finishing touch.
All six looks are fab, so I’m having a hard time picking a favourite. Let us know what you think of these six brilliant looks, and then hop on over to Jeniese’s blog to browse the rest of her outfits. Or check out her pinboards for more visual inspiration.


