Behind the Seams: Production

Series
“Behind the Seams” is written by Jessica Gold Newman, CEO of Dobbin Clothing in NYC. In case you missed it, here’s more background on Jessica and the series.

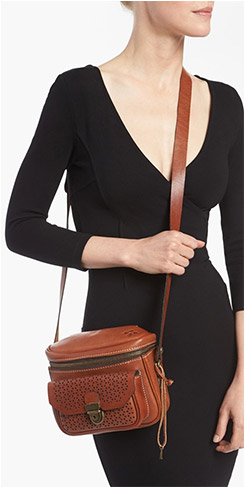
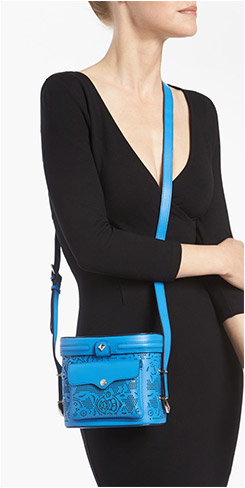
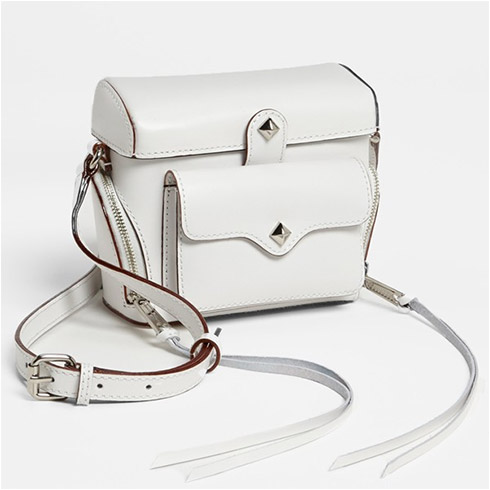
My apologies! It’s been a very long time since I posted here at YLF! The good news is we’ve launched our Spring 2013 Collection. The bad news is that the crunch time prior to launch meant our very small team was all hands on deck for the final month of production, photo shoots and web development.  We’re relieved and excited about being able to share and sell our third season, and about finishing our first full year of business.

Since my last post, which was about fittings and the marking and grading process, a lot had to happen very quickly. In this post, I’ll cover the immediate next steps in production, and in future posts, the additional steps it takes to launch the season.

Our patterns were finalized at our fifth and sixth fittings on the fit model. After the last few small tweaks by our pattern maker, we deliver the hand-drawn patterns to our marking and grading companies for scanning, grading and printing markers (large-scale printouts of all the sizes of the pattern) for our cutting room to use. It’s always a nerve-wracking process to hand over the manila envelopes of original patterns to the markers and graders; if they get lost, we have no time to start over on that garment. Once the pattern is scanned, the markers and graders have the computer file of the pattern and it can be printed anytime, which is a huge relief. It takes a few days to a week for the marker and grader to print our pattern pieces in every size on a marker, which is a big roll of paper that we deliver to the cutting room.

At the same time, we’re scrambling to buy and receive trim orders that are needed to produce our garments. In another post, I’ll explain how trim is chosen and how those choices affect the fit and quality of an item of clothing. The trim is delivered separately to our factories in anticipation of their sewing our line.

Once the markers are delivered to our cutting room (which is located on the same floor as one of our factories, conveniently enough!), we send the owner of the cutting room our size run, so that he knows how many of each size he needs to cut of a garment. The cutting room is a really amazing place. It’s a long, narrow room that houses huge cutting tables. Above those tables hang the electric hot knives the cutters use to stay as close to the pattern as possible when cutting our fabrics.

The marker and grader and the cutting room help us to try to achieve the best ‘yield’ as possible. This means that we all strive to use less fabric to produce our garments, and to lose fewer extra fabric scraps on the cutting room floor. The marker and grader does this by lining up all the pattern pieces on the marker in a way that there’s very little space in between all the pieces. These spaces are where fabric gets lost. The cutting room is able to further optimize our yield in the cutting process.

Here’s why having a ‘good’ yield is best for us and for the customer: if our fabrics cost $28/yard, not including the shipping costs it took to get those fabrics to us from Italy, we want to make sure that we don’t use more yardage than necessary to make one garment. Of course if we do need multiple yards it means we need to increase our retail prices in order to price the garment in a way that we still make a modest profit. We aim to keep our prices under $200, so the fabric cost and yield constantly factor into that equation.

When the cutting room finishes with a garment, they deliver large bags of all the different parts (pieces of fabric) of the garment to the factories for sewing. The factories then start piecing together the puzzle of sewing the clothes, all the while following the original pattern and the final sample in order to achieve our desired result. 

I just want to stress what an intense and complicated process the sewing of clothes is. At this point, apparel factories around the world, but particularly those in major cities like New York where our sewing rooms are located, employ very skilled workers. Clothing production is as much a craft as pattern making. The right machines must be used in the right way, with the right thread, and with finessed techniques that mean it takes weeks to sew our clothes properly. We want our clothes to stand up over time, and so we need to be patient while the clothes are sewn correctly, and not hastily. Details like the twist neckline on two of our dresses meant an entire extra week spent carefully sewing just that element over and over. If questions or problems arise or the factory needs additional or alternative trim during the sewing process, we run down to the factory to chat with the owner and the women sewing our clothes. It’s a very interactive process and we feel so lucky to live in close proximity to where our clothes are made. We can do quality control throughout the process to again ensure that our end product has integrity and is sewn for durability. We can’t control everything and we can’t be there at every moment, but we try our best.

As soon as the garments are finished in production, Catherine and I run a quality control on them and count the goods to make sure we have the correct amount per the original size run (and with known changes in yield, fabric shortage etc.). From there we inventory everything and get it ready for shipment!

In the next post, I’ll cover trim choices. So glad to be back at YLF!

Crossbody Camera Bags: Yay or Nay

These aren’t actually bags for your camera, but rather everyday bags that have been inspired by the retro camera bag. So fun! I’m not a crossbody bag lady, but this shape makes me reconsider the style. Granted, it’s a pretty bulky shape to wear on your side, but that’s also part of the charm. 

You might even be able to snap up an authentic retro camera bag in good condition from a vintage shop to  wear as an everyday bag. I’m a yay all the way. What’s your verdict?

Patricia Nash Andalucia Perforated-Leather Crossbody Camera BagRebecca Minkoff Craig Crossbody Camera Bag - CeruleanRebecca Minkoff Craig Crossbody Camera Bag - White

Affiliates
Some of the links in this post generate commissions for YLF.

Your Style: If It’s Fabulous, Don’t Fix It

I’m always on the lookout for tops in new styling. I fit on all sorts of new-to-me styles that tickle my fancy, and thoroughly enjoy the process. But here’s the thing: I’m actually quite unadventurous with my tops. 

In recent years I haven’t found a new style that I like more than my three staples: a button-down shirt, a tailored turtleneck, or a crew/slash neck pullover in a roomy fit with a banded bottom. Whenever I fit on a top in one of these three styles, the planets align. My emotional response changes from like to love, and I go from feeling good in my outfit to feeling fabulous in my outfit. It has to do with the way these styles work with my long neck, short hair, and dainty shoulder line.

Granted, I like variety in these three types of tops. I wear button-down shirts in tailored and roomy fits across all colours, patterns and fabrications. Silk, linen, cotton, lace, rayon, polyester, dots, stripes, florals, geometric patterns — it’s all good. But the collar must pop, and the sleeves must scrunch unless they are French cuffs or a tuxedo shirt collar. I like tailored turtlenecks in an assortment of knitted gauges, patterns and colours. And I’ll wear crew/slash neck sweaters in a variety of weights, fabrics, stitch interests, fits, lengths and sleeve styles. So I’ve actually been able to build enough variety with a wardrobe based predominantly on three styles of top. 

Although I stick to updated modern classics in the tops department, this doesn’t mean that I’m not evolving other aspects of my wardrobe all the time. My hair, trouser silhouettes, jeans silhouettes, jacket style, bag style, shoe style, skirt style, and colour palettes are the places that I am more creative. So while one part of my wardrobe is relatively constant, my style as a whole always feels refreshed.

This brings me to my point: If a component of your style continues to make you feel fab, there is no need to change it for the sake of change alone. Work it! And evolve your style in other areas.

Sometimes when my clients fear that they aren’t being adventurous with a particular area of their wardrobe, I remind them how set in my ways I am when it comes to tops. Of course, I am all for trying new things and challenging comfort zones, because that’s how we evolve and improve our style. But in the same breath I will also reassure you that when something about your style isn’t broken and feels fabulous, it doesn’t need fixing.

Roundups

Simpler Items

This week's list of top picks list is about basic pieces.

Read More

Assorted Items

Items for Summer, both in and out of air conditioning.

Read More

Casual Summer Vibes

This week's top picks are good for a casual Summer vibe.

Read More

Summery Earth Tones

These items are for those who like to wear casual earth tones in warm and hot weather.

Read More

Hints of Spring

Some tried-and-tested winning items to refresh your style for Spring.

Read More

Dressier Items

An assortment of dressier top picks might be just what the doctor ordered.

Read More

Summer Sandals

Belle By Sigerson Morrison Daisy SandalIt’s sandal season, which means showcasing those pretty feet! My clients are excited about our freak warm weather just so that they can start wearing their new sandals. The styles I have selected range from dressy to casual and cover an assortment of price points, style integrities and heel heights. They range from comfortable to extremely comfortable depending on the fussy-factor of your feet. I have the fussiest sandal feet in the world, and even I found a few pairs I could sport, weather permitting. Some styles work well for low volume feet, while others are all about filling out the silhouette. Be sure to look at all the colour options.

  1. Marc Jacobs Clean Metallic Wedge: A dainty little darling with the sweetest baby wedge that’s available in both metals. The ankle strap is quite comfortable, and not as horizontally cutting as you might expect. 
  2. Born Caity Crown Collection: This one is for Team Modern Bohemian. If you can do the heel height, it’s a comfy sandal. I vote aqua. 
  3. Sam Edelman Gigi: I have many happy clients in this flat thong sandal that Sam Edelman repeats every season. I don’t find it comfortable because I don’t like to wear straps between my toes, but I’m in the minority. It comes in many colours and patterns. Read the rave reviews.
  4. Sam Edelman Serena: The broad ankle strap that’s positioned above the ankle bone is the sandal look of the season, and it’s pretty comfy in a well designed sandal like this one. Great on feet that can fill out the style. Wear a low contrast colour to offset the cutting horizontal line on bare legs. 
  5. Clarks Evant Julie: Soft leather and a cushioning footbed make these fab. Breezy perforation and a small peep toe are great style details. 
  6. Stuart Weitzman Tieoneon: A very strappy and on trend high vamped sandal with a manageable heel height. Versatile. I can see it with shorts, dressy frocks and everything in between. Read the rave reviews.
  7. Zara Crossover Sling Back Hologram Sandal: Disco! The leather is not soft, but they look wonderful on the foot. Retro and modern. 
  8. Zara Pointed Block Heel Shoes: On trend, refined, gorgeous and perfect on a low volume foot. I wish these worked for me but as with many shoes from Zara, the leather is just not soft enough. I hope they work for you.
  9. Vince Camuto Hannah Sandal: My clients love this one because it works with dressy and casual clothing. And it’s super comfy if three inch wedges are your thing. Soft leather and footbed. 
  10. Nine West Vilta: Sporty and fun in the tan with orange piping. The sandal style of the year and pretty comfy. Not good on low volume feet. 
  11. Lucky Brand Miller 2: This one is for Team ’70s. Surprisingly comfortable because of the stretchy straps. I vote peach silver. 
  12. Ecco Omak Perf Sandal: Another sporty sandal that’s chunky in a refined way. They might run half a size large. Loving the white. 
  13. Ecco Odense T-Strap: Another tried and tested classic style that’s a winner with some of my clients in the metallic. Very comfortable and polished casual. 
  14. Belle By Sigerson Morrison Daisy Sandal: Fun trendy sandal that is also surprisingly comfortable if you can manage the heel height. 
  15. Biala Jillian Wedge Sandal: The sandal is as light as a feather. You can’t feel them on your feet! Quite good for low volume feet when you size down. I like the contrasting sole. 
  16. Sperry Top-Sider Lynbrook Sandal: An adorable casual version of the oh so trendy broad ankle strap. The straps are adjustable so it works for a range of foot widths. 
  17. INC Fama Wedge Sandal: For a brief moment I considered getting them in the bisque. Suede shoes are really comfy and these work for low volume feet. Great wedge shape. 
  18. Nine West Offdahook Sandal: This is the sandal that knocked my socks off. If I needed a dressy sandal, this would be it. It works well on low volume feet and the dainty heel is quite stable. Soft straps and pretty comfortable. All the colours are fab.  
  19. Marc Fisher Bly Sandal: The softest leather of them all! Just love the shape of the higher ankle strap styling. The light blue and orange are extra fab. 
  20. Anyi Lu Athena Sandal: Gorgeous, graphic, trendy and beautifully made. The strap is a little finicky to fasten but it’s worth the fuss. Works for a wider foot too. 
  21. Splendid Evanston Strappy Sandal: Our forum member Cocolion recently bought these and blew me away. That criss-cross ankle strap is stunning, as is the perforated texture. Works for a wider foot.

I still don’t have any sandals and I’m almost certain that I won’t be purchasing a pair. I prefer closed shoes, period. So my go-to shoes for Spring and Summer are pointy toe pumps, wedged Converse sneakers and slipper flats. What are your go-to shoes for the warmer months?

Marc Jacobs Clean Metallic WedgeBorn Caity Crown CollectionStuart Weitzman TieoneonZara Crossover Sling Back Hologram SandalNine West ViltaLucky Brand Miller 2Ecco Omak Perf SandalEcco Odense T-StrapSplendid Evanston Strappy Sandals

Four Starting Points for Outfit Creation

Outfit creation is at the heart of your style. This is where it all comes together, and it is where you can achieve maximum impact because it’s not just about the item itself, but how you wear it that counts. 

I have many clients who ask me to help them only with outfit creation, because that’s where they get stuck. That means they’ve edited and reviewed their closet and shopped for items on their shopping list on their own, but find it challenging to create flattering, interesting and comfortable outfits. So we spend anywhere from several hours to the entire day putting together outfits for all aspects of their lifestyle. Along the way we document the combinations we come up with and note wardrobe gaps and surpluses.

I go into the outfit creation process with my head full of information that acts as reference point and inspiration, often very specific to my client’s needs. This makes it hard to distill general guidelines, but recently I have been thinking more about the things that my outfit creation sessions have in common. I realized that our approach often falls into one of four categories, each based on a different starting point.

1. An Item

The item could be a new pair of trousers, a dress, a skirt, a top or topper, belt, necklace, or pair of shoes. Any wardrobe item at all. Sometimes my clients will pull out an old item that they love and want to find ways to wear it more frequently. More often they have bought a new piece that they adore, but are stuck on how to use it in a fabulous outfit.

The challenge with using a single item as an outfit creating starting point is that it’s only one piece of the puzzle and you might not have much context for the rest of the picture. 

2. A Colour Palette 

You might want to create a set of outfits within a particular colour palette because it is a new-to-you colour combination that you really like, or because you already have a lot of that palette represented in your wardrobe and want to make better use of it. Sometimes the setting dictates a particular colour palette. For example, I have executive clients who prefer to work within a neutral colour palette.

The challenges with using a colour palette as an outfit creating starting point are twofold. First, it is sometimes tricky to combine hues and intensities in ways that work well together, and with your complexion. Second, I find with my clients that certain colours and colour combinations really test their comfort zone. Too bright, too flashy, too muted, too cold or too warm. Colours are very emotive, after all, so they generate strong feelings, especially when associations from the past get involved.

3. An Outfit Formula

Outfit formulas can be general, like jeans + blouse + blazer + flats. Or they can be more specific like the dressy nostalgic tee ensemble, which combines a nostalgic tee with a pencil skirt, chic dressy jacket and girly shoes. Formulas are a very effective way to simplify the outfit creation process, and they can also be a very efficient way to think of your wardrobe, creating a series of “uniforms” that you can wear in different situations.

They do also have their challenges. First, you have to know about a formula in order to use it. Second, a formula is seldom all that you need. A general formula leaves a lot of blanks to fill. And a very specific formula is hardly ever perfect for everyone and will require some substitution when it is applied. For example, in the jeans + blouse + blazer + flats formula, it can be quite effective to substitute the blouse for a layering tee or sweater, or the flats for heeled ankle boots. This is where my clients sometimes battle, not realizing the substitutions they can make, or just not having the confidence to make them.

4. A Copycat Example

The popularity of this starting point has exploded along with the growth of Pinterest, with people pinning and sharing outfits from blogs, catalogues and online style magazines. These days my clients will often show me an outfit on their Pinterest boards or in a fashion magazine and ask for my help in replicating the look.

The copycat approach is easier said than done. Seldom is the person wearing the outfit an exact match for your persona, lifestyle and body type. So the challenge is to modify and substitute, capturing the essence of what you like about the outfit, but making it work for you.

Looking back over the years of YLF I realised that I have written relatively few posts about the nuts and bolts of outfit creation. This is probably because it is so hard to give specific, tangible advice that will apply to everyone. But just because it’s hard doesn’t mean I shouldn’t try. I’m going to use the set of starting points above as a framework and in future posts I will tackle each one in more detail.

Are there other approaches or starting points that you find useful when you set about creating outfits?